

Alright, so I’ve been fiddling around with this “skin honeycomb” idea lately. Sounds a bit weird, right? But I had this project, just a small personal thing, trying to get a particular texture, and everything I found online was either too complicated or just plain ugly. You know how it is. You think, “This should be simple,” and then BAM, three hours later, you’re still staring at a blank canvas, or worse, something that looks like a toddler’s art project.
So, this whole honeycomb thing started because I wanted a pattern that felt a bit organic, but still structured. Not just flat hexagons, but something with a bit of depth, like it’s part of a surface, a skin, almost. I first thought, “Easy, I’ll just grab a hexagon tool and tile it.” Wrong. Looked terrible. Like something from a cheap sci-fi movie from the 70s. No soul to it, you know?
My first few attempts were, honestly, a bit of a mess. I tried drawing them by hand, thinking maybe the slight imperfections would give it that organic feel. Nope, just looked wobbly and unprofessional. Then I went back to digital, trying to use basic shape tools in some graphics software I have. I’d lay out the hexagons, try to get them to tessellate nicely. But they were always too perfect, too clean. Honeycomb in nature isn’t perfectly uniform; the cells have slight variations, the wax isn’t perfectly smooth.
Getting a Bit Closer
I figured the “skin” part meant it needed to feel less like a sticker and more like it was part of the material. So, I started messing with tiny offsets for each hexagon, just a pixel here or there. That helped a little. Then I tried to introduce some very subtle warping, making the lines not perfectly straight. That was a pain to do manually, let me tell you. I almost gave up and just decided to live with a plain texture.
The thing is, I’m stubborn. When I get an idea in my head, I have to see it through, or at least try my best. It’s like that time I decided to build my own bookshelf because I couldn’t find one that was exactly the right shade of brown. Took me weeks, and the amount of sawdust was incredible. My wife was not amused, but the bookshelf? Perfect. Anyway, back to the honeycomb.
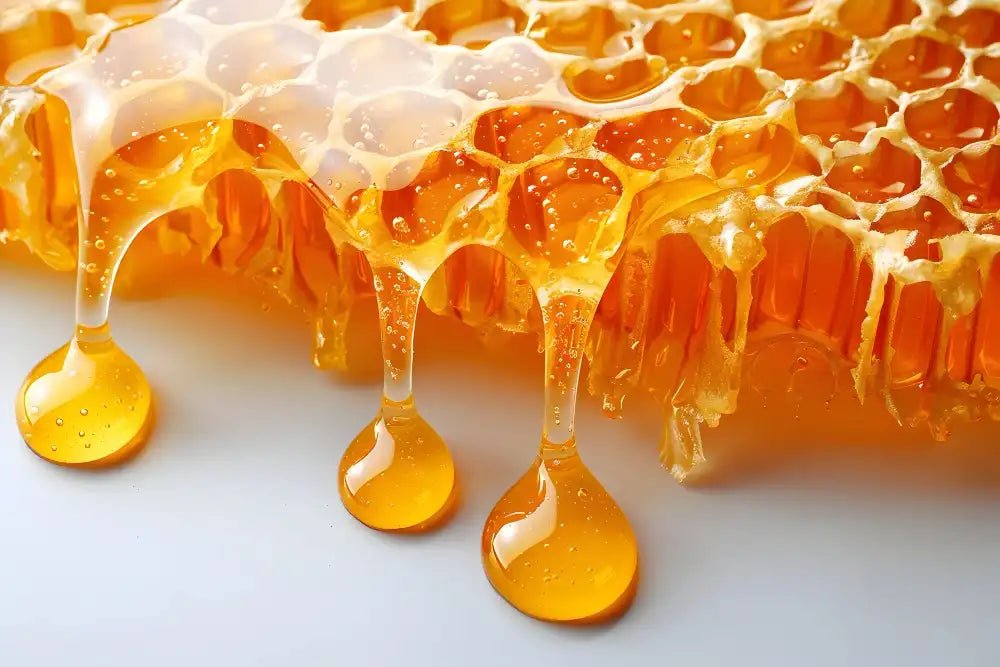
I started looking at actual pictures of honeycomb, not just diagrams. And I noticed the edges of the cells aren’t sharp; they have a slight roundness, a bit of thickness. And the surface isn’t flat; there’s a slight dip into each cell. So, I tried to mimic that. I started playing around with adding a very subtle inner shadow or bevel to each cell. That started to give it some of the depth I was after. It wasn’t just flat anymore; it looked like you could almost touch the indentations.

Then, the “skin” aspect. I realized the overall pattern needed to flow, especially if it was going onto a curved surface in my mind. So, instead of just a rigid grid, I tried to apply a very slight overall distortion, like the whole sheet of honeycomb was gently flexed. This was tricky because too much and it just looked distorted and weird. But just a tiny bit seemed to help it feel more natural, less like a computer-generated pattern and more like something that could actually exist.
It’s still not perfectly what I have in my head, but it’s way better than those initial flat, boring hexagons. It’s got a bit of that textured, almost tactile feel I was aiming for. The process was way more fiddly than I expected for something that sounds so simple. But hey, that’s how these little projects go, right? You dive in thinking it’s a quick job, and then you learn a whole lot more than you bargained for. Now, I’m thinking about how to add even more subtle imperfections, maybe some variation in cell depth. But that’s a headache for another day.


